

Brooder Box Setup Checklist helps me keep the first week calm, readable, and easy to manage when chicks arrive. I like having one place to look for heat, bedding, water, feed, cleaning, and daily inspection notes, because the first few days can feel busy even when the routine itself is simple.
A good brooder does not need to look fancy. It needs to be clear, steady, and easy to clean. If I can check the temperature in a glance, see whether the bedding is dry, and reach the waterer without moving half the box, the whole setup works better. That is the point of this guide. It is a practical checklist for building a small space that supports chick care without turning every visit into a guessing game.
For readers who want more home care and product planning guides, I also link to Household Products Map when I compare tools and materials.
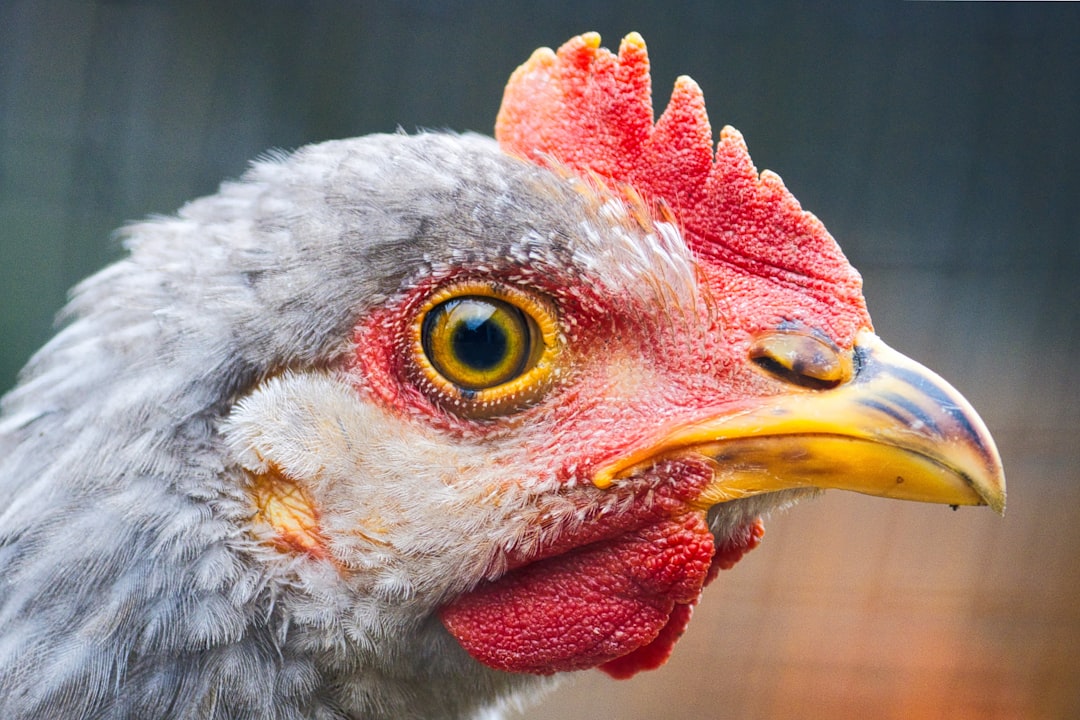
Brooder Box Setup Checklist: what the first week asks from you
The first week is mostly about steady habits. Chicks do best when their space is predictable, their bedding stays dry, and the basic items are easy to reach. I think of the brooder as a small work zone. It should let me notice changes quickly instead of hiding them under clutter.
The checklist helps in three ways. First, it keeps the setup practical before the chicks arrive. Second, it gives me a short routine to follow every day. Third, it turns small observations into useful information. When I write down what I see, I am less likely to forget whether the bedding was damp yesterday or whether one side of the box felt cooler in the evening.
These are the items I like to confirm before I bring chicks in:
- A box or enclosure with enough room for movement and a clear heat zone
- A dependable heat source positioned so chicks can move closer or farther away
- A thermometer placed at chick height
- Dry bedding that does not turn into dust or heavy clumps too fast
- A feeder and waterer that stay upright and easy to reach
- A small cleaning kit for quick daily refreshes
- A notebook or note app for temperatures, behavior, and cleanup timing
When I skip one of these pieces, I usually notice the strain later. The box becomes harder to read. Cleaning takes longer. The chicks cluster in odd places because the layout is awkward. A checklist keeps that from happening. It gives the setup a clear order before the birds bring their own energy into the space.
The other reason I like the checklist approach is that it keeps me from overbuilding. It is easy to buy one more gadget, one more lamp, or one more accessory because it looks helpful in a store photo. In real use, simple and visible often works better than crowded and impressive. The goal is not to create a showpiece. The goal is to create a space that helps me inspect the chicks, keep the area tidy, and adjust quickly when the room changes.
A small note on timing. I like to check the setup at least once in the evening before the chicks come home, then again in the morning. That last walk-through shows me whether the lamp stayed steady, whether the bedding shifted, and whether any item feels awkward to reach. That kind of quiet rehearsal saves time later.
Choose the right box and room before the chicks arrive
The box itself does not need to be expensive, but it does need to be easy to inspect. I look for a shape that gives me a clear view from above and from the side. If I have to bend, twist, or move other items just to see the waterer, I know the enclosure will annoy me later. Visibility matters because inspection is part of daily care.
Size matters too. If the brooder is too small, bedding gets dirty quickly and the birds crowd each other. If it is too large for the number of chicks and the heat source is weak, the setup can feel scattered. I want enough space for the chicks to move away from the warm zone, but not so much space that they lose the benefit of staying grouped. In practice, I think about movement, not just square footage. Can the birds walk, rest, eat, and drink without constant pileups? Can I reach everything without placing my arm into the warmest corner for too long?
The room around the box matters almost as much as the box itself. I prefer a room with low foot traffic, steady temperature, and easy floor cleaning. A corner in a busy hallway sounds convenient at first, but repeated movement can make the chicks nervous. A room that swings a lot in temperature also adds more adjustment work. I want fewer surprises, not more.
Airflow is part of the room choice as well. A tight room with no fresh air can hold odor and moisture. A windy room can chill the chicks if the brooder is placed badly. I look for a middle ground. Fresh air should move through the room without blowing straight into the box. If a fan is present, I keep it aimed away from the brooder. If a window leaks cold air, I shift the setup before I add the birds.
Floor protection is another detail that saves time. I like a washable mat, tarp, or other easy-clean surface under the brooder so spilled water and stray bedding do not spread across the room. The first week can be neat one hour and messy the next. A floor layer gives me a clean start each day.
Before chicks arrive, I also test the route to the box. Can I carry water in without bumping furniture? Is there enough light to inspect the bedding at night? Can I place a small trash bag nearby for quick cleanout? These may seem minor, but they shape the daily rhythm more than most people expect.
When I want a useful rule for room choice, I ask one simple question. If I had to check the brooder in five minutes before leaving the house, would the space still work? If the answer is yes, the room is probably doing its job.
Heat, light, and airflow without guesswork
Heat is the part of the brooder that gets the most attention, and for good reason. Chicks are small enough that tiny changes in temperature show up in their behavior quickly. I do not rely on one sign alone. I watch the thermometer, but I also watch the birds. The best setup gives both of those signals a chance to match.
The heat source should create a warm zone and a cooler zone. That way, chicks can choose where to stand. If they bunch tightly under the lamp for long stretches, the warm area may be too small or too cool. If they scatter to the far edge and stay there, the lamp may be too strong or too close. I like a layout that lets them drift between zones without stress. Choice is more useful than a single fixed comfort point.
I place the thermometer at chick height rather than on a shelf or at room level. That small choice changes everything. Room temperature can feel fine to me, while the floor of the brooder tells a different story. The birds live where the bedding is, not where I stand. When I check the number, I also look at how quickly the chicks settle after a disturbance. If they return to normal behavior within a short time, the heat setup is probably close.
Light matters too. A bright lamp can make it easier to inspect the chicks, but I do not want the brooder to feel harsh. The birds need a clear day-night rhythm if the room allows it. I usually prefer enough light for evening checks and a gentler feel at rest. The point is not to keep the box glowing like a workbench all day. The point is to help the birds settle, eat, and drink without confusion.
Airflow is the piece that many people forget when they focus on heat alone. Warm air without movement can feel stale, and stale air brings moisture and odor. A little fresh air keeps the box easier to live with. But direct drafts create the opposite problem. So I think in terms of balance. Heat should rise and stay where it helps, while the room itself should keep air fresh without blowing into the chicks.
Here is the approach I use when I check the setup in the evening:
- Confirm the lamp or heater is secure and not tilted
- Check the thermometer at chick height
- Look for bedding that has shifted under the warm area
- Stand still for a moment and notice whether the room feels drafty
- Watch chick behavior for a full minute instead of reacting to one quick movement
If something looks off, I adjust one thing at a time. That matters. Changing heat, airflow, and bedding all at once can make it hard to know which change helped. Slow adjustments give better feedback.

Bedding that stays dry and easy to read
Bedding does two jobs at once. It gives chicks a softer surface to stand on, and it shows me what is happening in the brooder. Fresh bedding looks and feels different from damp bedding. That difference is useful. When I can read the floor quickly, I can clean faster and notice issues sooner.
I prefer bedding that is comfortable, dry, and easy to refresh. I avoid materials that create too much dust or that break apart in a messy way after a few hours. If the bedding clumps too fast, I spend more time digging through the box than observing the birds. If it is too light, it can move around and hide droppings or spilled water. I want a middle ground that supports both comfort and inspection.
Depth matters. A thin layer may look neat at first, but it can expose the floor and become uneven fast. A very deep layer can hide spills and make the box harder to read. I like enough bedding to cushion movement while still letting me see the condition of the floor. In the first week, that visibility is valuable. If one corner gets wet, I want to spot it right away.
Spilled water is the main reason bedding changes quickly. If the waterer sits too low, the bedding near it can turn dark and heavy within hours. That is why I keep a small cleaning tool nearby. I scoop the wet spot, replace the bedding, and check the base of the waterer before I walk away. A fast response keeps the rest of the box cleaner.
I also watch the chicks’ feet and posture when they move across the bedding. If they seem reluctant to step in one area, the floor may be too slippery, too rough, or too damp. Their behavior tells me a lot. A brooder is not only a container. It is a surface they live on every minute of the day.
My bedding routine is simple:
- Fluff the dry areas each morning
- Remove wet clumps near the waterer
- Replace any bedding that has turned dark or compacted
- Check corners where droppings tend to gather
- Add a light top layer only when the floor still reads clearly
The trick is to keep the bedding looking intentional rather than random. I want a floor that is comfortable, but I also want a floor that tells the truth. Once it stops telling the truth, cleanup gets slower and inspection gets weaker.
One more point. Bedding should match the rest of the box. If the feeder scatters a lot of feed, choose a floor material that shows the scatter without swallowing it. If the brooder room stays cool and damp, look for a surface that can handle more frequent refreshes. The right bedding is less about a brand name and more about whether the floor stays legible after a normal day.
Feeders, waterers, and placement that reduces mess
Feeders and waterers seem simple, but placement changes how the whole brooder behaves. A feeder in the wrong spot gets scratched over, tipped, or buried in bedding. A waterer that sits in the busiest path becomes a spill magnet. When I set these items, I am really setting traffic flow.
I like to keep feed and water separate enough that one spill does not immediately affect the other. That means not crowding them into the same tiny corner. At the same time, I do not want them so far apart that chicks have to cross the entire box to get from one to the other. A compact, sensible triangle works well in many small brooders. The chicks move, but not in a frantic loop.
Height matters. If the feeder sits too high, smaller chicks may struggle to reach it. If it sits too low, they scratch feed everywhere. The same basic rule applies to water. I want easy access without a setup that invites extra mess. That is one reason I re-check the height after the first day. The birds grow quickly, and a position that felt right in the morning can feel less right by evening.
I also pay attention to edge space. Items placed directly against a wall can be hard to refill and harder to inspect. I leave enough room to lift a waterer out, wipe the base, and look underneath. Small gaps save time. They also make it easier to notice wet bedding before it spreads.
Here is how I think about the feeder and waterer together:
- The feeder should be visible from the main viewing side
- The waterer should be stable enough to resist small bumps
- Both items should be easy to remove for cleaning
- Neither item should block the chicks from reaching the warm zone
- Both items should sit where I can inspect them without moving other gear
Mess often starts with one poor decision. A feeder too close to the bedding edge, a waterer with a weak base, or a placement that forces chicks to crowd in the same spot can set off a chain reaction. Once that starts, the floor gets dirty faster and the birds spend more time pushing each other around.
One habit I value is checking the feed line before I leave the room. Is the feeder still full enough for a few hours? Did bedding blow into the tray? Is the water level where it should be? These are tiny questions, but they keep the routine calm. A good brooder setup answers them quickly.
If I had to choose one rule for this section, it would be this. Put the feeder and waterer where the chicks can reach them easily, but where I can also lift, wipe, and inspect them in a few seconds. That balance saves the most work over time.
Daily inspection habits that catch problems early
Daily inspection is where the setup becomes useful. A nice-looking brooder is not enough. I want a brooder that gives me signals I can trust. That means watching behavior, checking the floor, touching the equipment, and noticing small changes before they turn into a larger cleanup.
When I inspect in the morning, I start by looking at the chicks before I touch anything. Are they evenly spread or crowded in one corner? Are they active, sleepy, or restless? Do they move toward the feeder and waterer on their own? Their layout tells me how the box felt overnight. I trust that pattern more than a quick glance at the thermometer alone.
Then I check the floor. Wet bedding near the waterer is normal to a point, but dark patches spreading farther out tell me the spill area is getting bigger. Feed scattered beyond the tray also tells me the chicks are scratching harder than the current setup can handle. When I see these signs early, I can fix them with small changes instead of a full reset.
After the floor, I inspect the equipment. Are the screws, clips, or support points still firm? Did the lamp shift a little? Is the waterer sitting level? These things change slowly, so they are easy to ignore until they are not. A ten-second check can save a lot of cleanup.
I like to use the same inspection order each time because it lowers mental clutter. My routine usually looks like this:
- Watch chick posture and movement
- Check the warm and cool zones
- Look at bedding near water and feed
- Touch the equipment to confirm it is stable
- Record anything unusual in a note
Notes matter more than people think. If I see one chick resting apart from the group, I write it down. If the waterer leaked overnight, I write that down. If the room felt cooler than usual at dawn, I write that down too. The point is not to create paperwork. The point is to build a memory I can trust.
When I compare one day to the next, patterns show up. The box may be fine in the afternoon but too cool before sunrise. The bedding may stay dry until the waterer is refilled to a certain level. The chicks may crowd one side after lights change. A daily inspection routine turns those patterns into practical information.
One image makes this easier for me. I imagine the brooder as a small dashboard rather than a box. Every corner is a signal. Every tray, mat, and lamp tells me something. The more often I check, the easier the signals become to read.

Common mistakes and how I correct them
Most brooder problems begin with small setup choices that looked fine on day one. I have made enough of those mistakes to know they are normal. The useful part is spotting the pattern quickly and correcting it without turning the whole brooder upside down.
One common mistake is placing the heat source so the warm zone is too small. The chicks then pile up under the lamp, and the floor underneath becomes crowded and hard to read. If I see that, I widen the comfort area a little or adjust the lamp height so the chicks can spread out more naturally. I do not make a huge change all at once. Small steps are easier to judge.
Another mistake is using a waterer that creates a damp ring in the bedding. I know that one well. It starts as a neat little patch, then grows into a darker area that spreads farther than expected. My fix is usually to raise the waterer slightly, move it to a more stable part of the box, or switch the bedding underneath more often. The goal is a cleaner base, not a heroic rescue later.
Overcrowding is another issue that looks minor at first. A brooder that feels roomy with three chicks can feel cramped with ten. The birds then spend more time stepping on each other, kicking bedding into the tray, and blocking the entrance to the warm zone. I correct this by thinking about layout before I think about decoration. Extra accessories do not help if the birds cannot move.
Too much gear can also become a problem. A brooder packed with accessories leaves less floor space and less room for inspection. I prefer fewer items placed well rather than many items placed badly. That keeps the box readable and easier to clean.
There is also the mistake of changing too many things at once. I understand the urge. If the chicks look uneasy, it feels natural to adjust the lamp, shift the feeder, replace the bedding, and move the box all in one pass. But then I cannot tell which change mattered. I make one change, watch the birds, and then decide on the next move if needed.
My correction checklist is simple:
- Reduce crowding by giving the chicks more usable floor space
- Reposition the waterer if the bedding stays damp too long
- Adjust heat in small steps, not dramatic jumps
- Remove extra items that make the floor hard to read
- Watch chick behavior after each change before making another one
The biggest habit here is patience. Small brooder issues do not need frantic fixes. They need clear observation. If I keep the setup easy to read, corrections become much simpler.
I also like to remind myself that the chicks are giving feedback all day. Their spacing, their movement, their feeding pattern, and their resting position all tell a story. If I am paying attention, I can answer that story with a small adjustment instead of a larger reset.
Product comparison points for lamps, thermometers, and liners
When I compare brooder products, I try not to get lost in marketing phrases. I want to know what the item does in a real box, in a real room, with real cleaning and real chick movement. A product can look clever in a listing and still be awkward in daily use.
For lamps or heat sources, I compare how steady the setup feels, how easy it is to position, and how clearly it creates a warm zone. A good heat tool should feel secure, simple to adjust, and easy to inspect from the room side. If I need a long struggle each time I check it, I know the design is not helping me.
For thermometers, I like a display that is easy to read from a short distance. Accuracy matters, but so does placement. If a thermometer is hard to see, I stop using it as often. That is a design failure in my book. I want information at a glance. A display that gives me the number quickly is better than a stylish one that hides the answer.
Bedding and liners are another comparison area. Here I look at absorbency, dust level, cleanup speed, and how well the material shows damp spots. A liner or bedding choice should support inspection, not hide the floor condition. If it looks neat but masks spills, I consider that a weak fit for the first week.
Here is the short comparison list I use:
- Stability — does the item stay in place during normal chick movement?
- Visibility — can I inspect it without lifting other gear?
- Cleanup time — how long does a routine refresh take?
- Readability — can I see temperature, moisture, or wear quickly?
- Space use — does the item help the brooder, or crowd it?
These comparisons save money because they shift the decision away from shiny extras and toward daily function. A simple tool that works well for seven days is worth more than a clever tool that makes every check a little harder.
I also like to imagine replacement timing. If something wears out or stops fitting the brooder flow, can I swap it quickly? Can I find a second option without redesigning the whole box? Flexibility matters. The first week often reveals what the product listing did not.
One more product note. I try to buy items that are easy to wipe, easy to remove, and easy to see. That sounds basic, but it is the difference between a setup that supports inspection and a setup that fights it. In this kind of work, basic is usually a compliment.
A simple seven-day routine you can repeat
A routine helps more than a pile of tips. Once the box is set, I like a sequence that I can repeat without much thought. The first week is full of small changes, and a routine keeps those changes from feeling random.
On day one, I do a longer check. I watch the chicks settle into the warm zone, confirm the feeder and waterer are easy to reach, and check the bedding again after the first hour. I also look for any sign that a corner of the box is harder to access than I expected. That first day tells me more than any label on a product box.
On day two and day three, I focus on consistency. Are the chicks eating and drinking in a normal pattern? Did the bedding stay dry longer than yesterday? Did the heat feel steady across the whole evening? I do not change the setup just because I want to tinker. I wait for patterns.
By midweek, I usually know which item needs the most attention. It may be the waterer base. It may be the bedding near one wall. It may be the lamp angle. The routine gives those weak spots a chance to show themselves without turning into a bigger issue.
A simple weekly rhythm can look like this:
- Morning — inspect chick spacing, bedding, feed, and water
- Midday — top up supplies and check the warm zone
- Evening — refresh wet bedding and confirm equipment stability
- End of day — write one short note about anything unusual
That rhythm keeps the work manageable. It also helps me avoid making emotional fixes late in the day when I am tired. A small note in the evening usually gives me a better answer the next morning.
When I compare good brooder routines to messy ones, the difference is rarely dramatic. It is usually about whether the person notices early, adjusts slowly, and keeps the box easy to read. That is why a simple routine works. It gives me a repeatable way to stay ahead of small issues without overthinking every detail.
If I had to sum up the seven-day approach in plain language, it would be this. Set the box so the birds can move, inspect it in the same order each day, and change one thing at a time when the setup tells you something useful.
When the brooder box is ready for the next stage
At some point, the brooder starts to feel less delicate and more routine. The birds are moving with confidence, the bedding stays readable for longer, and the cleanup takes less time than it did on day one. That is a good sign. It means the setup is doing what it was supposed to do.
I look for a few simple markers before I think about the next stage. The chicks should be using the box evenly. They should have clear access to feed and water. The warm zone should still make sense, but it should not be the only place they want to stand. The room should stay manageable for cleaning and inspection. When those pieces line up, the system feels stable.
That stability matters because it gives me room to plan instead of react. I can think about the next size of enclosure, the next bedding change, or the next equipment choice without rushing. The brooder has done its job when it becomes easy to live with. The inspection routine still matters, but it stops feeling like a constant rescue mission.
The best setups are the ones that teach the keeper something useful. They show how the birds move, what kind of waterer stays cleaner, which bedding makes inspection easier, and how much space the chicks actually use. Those lessons matter the next time I build a brooder or help someone else choose supplies.
Before I finish a first-week brooder review, I ask myself three questions. Did the box stay easy to read? Did the cleanup stay reasonable? Did the chicks have enough space to choose where they wanted to be? If the answer is yes, the setup likely deserves to stay in place with only small adjustments.
A brooder box setup checklist is useful because it keeps the work honest. It turns a long list of small decisions into a routine that can be repeated and improved. That is how a simple box becomes a good place for early chick care: clear layout, steady heat, dry bedding, clean water, easy feed, and a daily inspection habit that catches small changes before they grow.
When those parts line up, the box stops feeling improvised and starts feeling dependable. That is the standard I aim for every time.