

If you want a calmer home that stays tidy without marathon cleanup sessions, start with a house combing checklist. Think of it as a clear, repeatable route through your rooms that helps you decide what to keep, where things live, and how to reset spaces quickly when life gets busy.
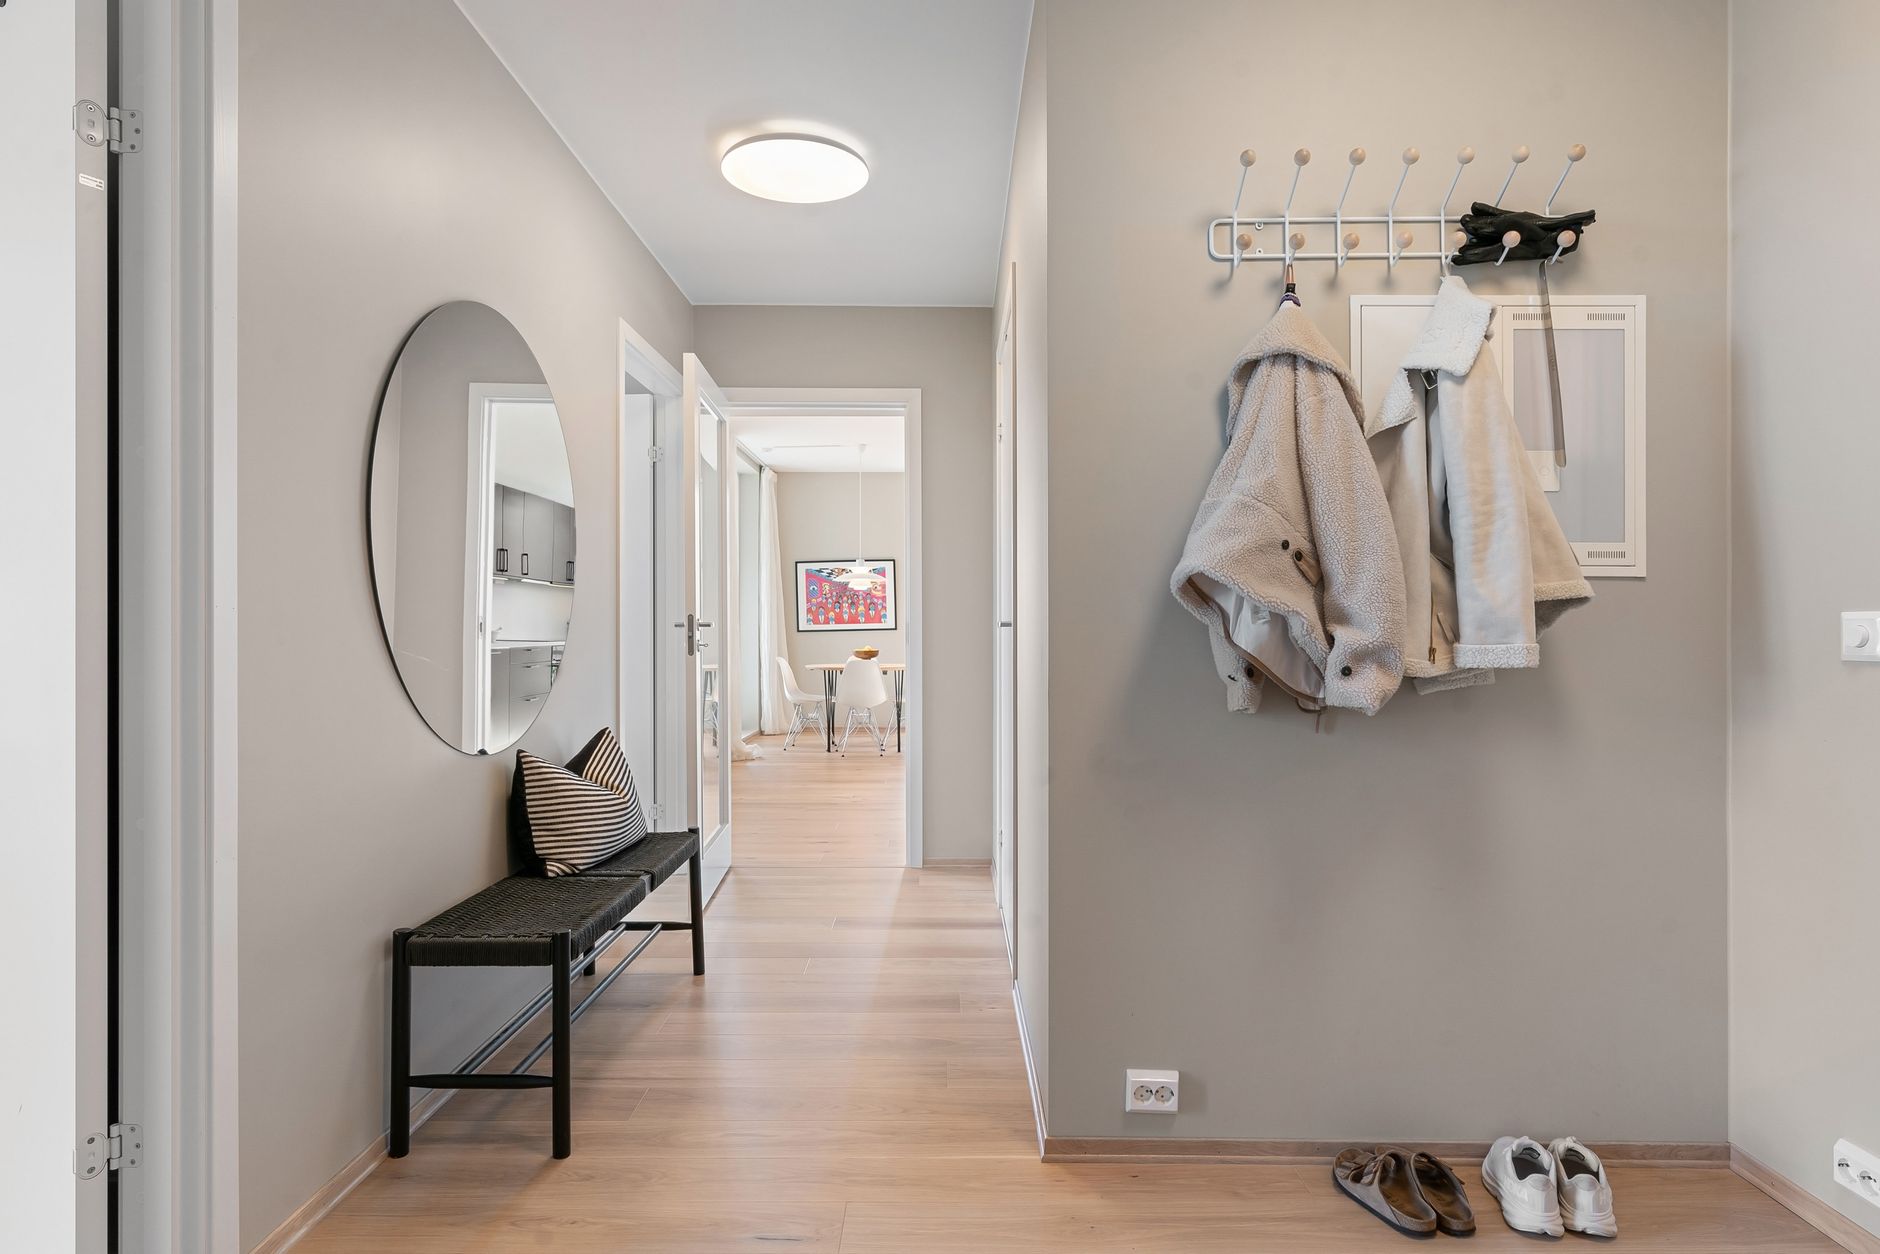
House combing is not a single weekend project; it is a way of moving through your home with intention. You’ll make swift decisions, contain like with like, and create visible homes for everyday items so resets take minutes, not hours. This guide gives you a step-by-step route for every area, plus supply lists, timing cues, and maintenance rhythms so you can keep momentum with less effort.
Before you begin, gather a few basics: a timer, three sturdy bags or boxes labeled Keep Elsewhere, Donate/Sell, and Trash/Recycle, a permanent marker, painter’s tape for temporary labels, a notepad, and a measuring tape. Optional helpers include a hand vacuum, a small caddy for surface cleaners, and a phone for quick photos of items you plan to sell. Set a simple rule for yourself: if something does not have a job or a place, it needs one—or it leaves. With that floor rule in mind, let’s move room by room.
house combing checklist: room-by-room flow
This flow aims to build quick wins first and save heavier decisions for later. The order matters: you’ll create momentum in zones you see daily, then carry that energy into storage-heavy areas.
- Entry and drop zones first, so new clutter stops at the door.
- Living areas next, because visible progress boosts motivation.
- Kitchen and dining, where daily routines live and supplies pile up.
- Bathrooms and laundry, where small tweaks deliver big ease.
- Bedrooms and closets, including drawers and nightstands.
- Kids’ rooms and shared play or study spaces.
- Home office, paperwork, cords, and tech accessories.
- Garage, utility closets, and long-term storage.
At each stop, run the same four-part loop:
- Empty and sort: surfaces first, then drawers/cabinets, then floor and corners.
- Edit: remove duplicates, broken items, and anything you don’t use.
- Contain: group like items in a bin, basket, or drawer divider; label simply.
- Reset: assign a home that’s easy to reach, and make a visible cue so it’s obvious.
Work in 25–30 minute blocks with 5-minute breathers. You’ll be surprised how much moves in short sprints when the steps never change.
Quick-start 90-minute reset (when you need momentum today)
Sometimes you just need a fast win. Use this 90-minute circuit to break inertia and set the stage for deeper combing later. Set a timer and move briskly. Do not open drawers in this first pass—only visible surfaces, floors, and obvious out-of-place items.
- Front door and entry (10 minutes): shoes, mail, bags, keys. Install a temporary hook for keys, a tray for mail, and a mat or boot tray for footwear. Put extra shoes back in closets.
- Living room (15 minutes): clear coffee table, sofa arms, TV stand, and floor. Corral remotes in a shallow tray. Fold throws and stand them vertically in a basket. Remove orphan décor items that don’t belong.
- Kitchen counters (20 minutes): put appliances you rarely use in a cabinet. Wipe counters. Gather snacks into one bin. Move mail to the entry tray and assign a day to process it.
- Bathroom sink area (10 minutes): toss empties, relocate backups under the sink in a labeled bin, keep only daily items on a small tray. Place fresh hand towel.
- Bedroom surfaces (15 minutes): clear nightstands and dressers. Return cups to kitchen. Stack current book and glasses on a single tray. Remove jewelry to a small dish or drawer divider.
- Floors (20 minutes): quick sweep or vacuum in the rooms you touched. Take out the trash bag you filled along the way.
In just over an hour you installed three simple stations (keys, remotes, bathroom tray), freed up surfaces, and gave yourself visual breathing room. Momentum is now on your side.
Entry and drop zone: build a friction-free landing
The entry is where your day changes mode. If it is chaotic, clutter flows into every room. If it’s simple and clear, your home starts quiet and stays that way.
Steps:
- Define paths: make sure the door opens fully and nothing blocks your walk line. Remove furniture that makes you turn sideways to pass.
- Install a key hook or bowl right where your hand naturally pauses. If you have family members, add a second hook height for kids.
- Add a mail tray with two sections: Incoming and To Act. Mark a weekly processing day on your calendar.
- Use a shoe mat or boot tray sized for the number of pairs you want out—usually two per person. Everything else returns to bedroom closets.
- Give each person a simple tote or basket for hats, gloves, and daily bits. Label with painter’s tape to test placement before buying name tags.
Editing cues:
- Donate coats that don’t fit or that no one reaches for in the current season.
- Recycle old mail and flyers. Photograph paperwork you only need as a reference and file digitally.
- Consolidate umbrellas, keep the sturdiest one per adult, plus a compact spare.
Storage tips: Use narrow wall hooks, a slender console, or a small peg rail if space is tight. A deep basket by the door doubles as a catchall for library books or items to return. If you need more ideas, browse the House Combing category on our site for space-savvy entry setups here.
Living room: zone the room, free the surfaces
The living room often carries the highest visual load. You’ll feel instant relief by creating zones and limiting what lives on each surface.
Zones to define:
- Lounging: throws, pillows, remotes, phone chargers, reading light.
- Media: gaming controllers, headsets, charging dock, batteries.
- Reading: current books/magazines, bookmarks, glasses, a pen.
- Kids’ play (if applicable): a narrow bin for current toys, with overflow stored elsewhere.
Steps:
- Surface sweep: clear coffee table, side tables, TV stand. Keep at most three items per surface (for example, a tray, a plant, and one décor object). Put everything else in the Keep Elsewhere bin, then reshelve where it truly belongs.
- Contain: use a shallow tray for remotes and game controllers; it reads tidy even when full. Stand folded throws vertically in a floor basket, not draped over furniture.
- Paper pause: magazines and catalogs live in one slim magazine file. Keep current issues only; snap a photo of an article rather than saving piles.
- Device corral: create a charging dock inside a media cabinet or on a shelf. Label cords with simple tags (TV, Switch, Tablet). Coil extras and store them in a quart zip bag in a single tech bin.
Editing cues: remove duplicate décor, ditch stained or torn throws, recycle old catalogs, and return tools and craft items to their home zones. If pet toys scatter, use a small handled basket and train yourself to pick them up during commercial breaks or before bed.
Maintenance: adopt the “three things” rule. When you stand up, take three items with you to their homes. When you sit, reset the tray and fold throws. It takes less than a minute and keeps the room always-ready.
Kitchen: create a working line and eliminate crowding
A kitchen works best when everything needed for a task is within two steps of where you use it. Your goal is to carve a clean working line across counters, then tune cabinets so you reach for the right thing without rummaging.
Counter strategy:
- Clear to cook: put away appliances you use less than three times a week. Keep only the coffee setup (if daily), knife block or magnetic strip, and one utensil crock. If you bake often, a stand mixer can stay; otherwise, store it low.
- Snack station: dedicate one bin to daily snacks and one to grab-and-go breakfast items. Label simply. This stops new boxes from spreading across counters.
- Paper out: move incoming mail to the entry tray. Keep a magnetic pad on the fridge for running grocery notes; transfer to your phone before shopping.
Cabinet tune-up:
- Sort by task: cooking oils, salt, and pepper near the stove; cutting boards and knives near the prep area; dishes and glasses near the dishwasher or drying rack.
- Decant rarely. Use decanting only when it solves a problem (for example, kid-friendly cereal containers or space-saving canisters for baking staples). Keep original packaging if it shows instructions or if decanting would create extra work.
- Vertical dividers: store baking sheets, cutting boards, and serving trays vertically in a rack. It removes the heavy stack problem.
- Lazy Susan: use it in deep corner cabinets to eliminate dead zones. Group oils or condiments by type.
- Pantry audit: toss stale items, combine duplicates, and note the foods your household truly eats. Keep a “use first” bin for near-dated items and plan meals around it.
Fridge habits:
- Zones: top shelf for leftovers and ready-to-eat, middle for dairy and proteins, crispers for produce, door for condiments.
- Clear bins: one each for lunch ingredients, breakfast items, and prepared snacks. Label shelves with painter’s tape for two weeks to test your layout.
- Weekly five: every week, scan for items to use tonight, wipe the most-used shelf, refill the water filter, combine sauces, and check the “use first” bin.
Editing cues: donate duplicate gadgets, pass along specialty tools you never reach for, recycle warped food storage containers, and keep only as many mugs as you truly rotate in a week. A smaller set you love is easier to manage than a crowded hodgepodge.
Bathrooms and laundry: streamline routines you repeat daily
Bathrooms and laundry rooms become effortless when you reduce decision points. Keep only what earns daily or weekly use within arm’s reach. Everything else gets a labeled container and a defined shelf so you don’t rummage.
Bathroom loop:
- Counter clear: place daily items on a small tray. Backup items go under the sink in a bin labeled “Backups.” Toss empties and expired items.
- Drawer dividers: give each person a small section for everyday items. Label with painter’s tape until the layout feels right.
- Towels: two bath towels per person in rotation, plus one spare per bathroom. If your space is small, roll towels to save shelf height.
- Cleaning caddy: a single handled caddy per floor with the basics—glass spray, surface cleaner, microfiber cloths, toilet brush nearby. Stash behind the toilet or under the sink for quick resets.
Laundry loop:
- Sort at the source: use a two- or three-compartment hamper where clothes come off. Labels like Lights/Darks/Towels remove mental load.
- Supply station: decant laundry powder only if it speeds your process; otherwise keep it in the original container with a scoop. Store stain stick and mesh bags in a small bin on the machine.
- Folding zone: clear a consistent surface or install a drop-down shelf. Fold immediately when the cycle ends to avoid a “chair pile.”
- Backstock limits: one spare bottle or box per item; note the reorder point on a sticky note (for example, “buy when one-third left”).
Maintenance: anchor two rhythms—bathroom 10-minute counter reset every evening, and one laundry load from start to finish most days. These two tiny habits prevent weekend overwhelm.
Bedrooms and closets: fewer choices, easier mornings
Bedrooms should exhale. That starts with editing clothing, creating a simple capsule for daily wear, and making nightstands distraction-free. The goal is to reduce micro-decisions so mornings run smoother.
Closet edit:
- One-hour try-on: set a timer, pull everything you wear to work or school, and try items that are “maybes.” Anything uncomfortable, damaged, or that does not suit your current life goes in Donate/Sell. Limit nostalgia pieces to a single keepsake box.
- Capsule zones: group 7–10 daily tops, 3–5 bottoms, and 2–3 layers that mix easily. Front and center. Special-occasion outfits live on the side or upper rod.
- Uniform basics: socks and underwear in shallow bins; T-shirts folded into thirds and filed vertically so you can see them all.
- Accessory strip: install a narrow peg rail or simple S-hooks inside the closet for hats, scarves, and bags you grab often.
Nightstands and dressers:
- Clear the top: a lamp, current book, and a small dish for watch or rings. Nothing else.
- Drawer dividers: assign front section for sleep mask, lip balm, charger; back section for tissues or notebook.
- Dresser: use low dividers for underwear and socks; keep a donation bag in the closet so unworn items have a landing spot immediately.
Shoe strategy: store out-of-season shoes in a labeled under-bed bin or on a high shelf. Keep near the door only the pairs you actually wear midweek. If you hesitate about a pair for more than a month, list it for sale or donate.
Kids’ rooms and shared spaces: rotate, label, and simplify
Children thrive when choices are clear and limited. The simpler the environment, the easier it is for them to help reset. Your best tools are rotation, obvious homes, and pictures on labels.
Steps:
- Choose a display shelf for 6–8 current toys or sets. Everything else goes in a closet or under-bed bin, grouped by type (blocks, vehicles, dolls, art).
- Use broad categories for labels. For younger kids, print small pictures or draw simple icons so they know where things belong.
- Keep a shallow “work in progress” tray for LEGO builds or puzzles they’re actively enjoying, so pieces don’t spread across floors.
- Hang tomorrow’s outfit on a single hook each evening. Use a weekly cubby for sports gear or uniforms.
Shared zones:
- Homework caddy: pencils, highlighters, tape, scissors, sticky notes, and a small timer in a portable bin. Store on a bookshelf or in a cabinet so the table can clear after work time.
- Art cart: paper, crayons, markers, glue sticks, and a smock in labeled drawers. Limit supplies to what fits, and cycle in fresh items seasonally.
- Family library: one shelf per person for current reads; return finished books weekly.
Editing cues: if a toy type gathers dust for a month, move it to rotation storage. If it still doesn’t get play time after two rotations, donate to a local charity or pass to a friend. Keep sentimental artwork in a flat archival box; photograph bulky items before letting them go.
Home office and paperwork: the 20-minute paper plan
Papers multiply if they lack a simple route. Create a three-step pipeline you can run in 20 minutes a week.
Pipeline:
- Intake: mail lands in the entry tray, then moves to an office “To Act” folder. Set a weekly calendar block to pay, file, or contact.
- Action: during your block, work through the folder. Anything that takes under two minutes—do it right then. For longer tasks, add a to-do and place the paper in “Pending.”
- Archive: when the task is complete, either scan to a digital folder with simple names (YYYY-MM Vendor Name) or file the original in a slim, labeled file box. Shred sensitive items.
Desk setup:
- Only daily tools live on the desktop: laptop, notepad, pen cup, and a small inbox. Everything else belongs in a drawer or bin.
- Cord clarity: label chargers, store extras in a single tech bag or bin, and keep a power strip mounted under the desk to cut visible wires.
- Reference center: place manuals and rarely used papers in a single magazine file or scan them. Keep warranty info and receipts together by year.
Maintenance: hold a short weekly desk reset—clear the inbox, wipe the surface, empty the trash, and review your calendar. A tidy desk increases your odds of starting on time the next day.
Garage, utility, and storage: map zones and label clearly
Big spaces swallow things if you don’t map them. Treat the garage or utility closet like a tiny store with clearly marked aisles. You are designing visibility and reach.
Steps:
- Zone by activity: car care, sports, gardening, tools, paint, seasonal décor, bulk household goods.
- Shelving first: install sturdy shelves rated for your expected weight. Keep heavy items low and light bins high.
- Clear bins with large labels: label on two sides. Use bold, simple words. If items are borrowed or returned often (like sports balls), use open bins.
- Vertical storage: wall-mount bikes and yard tools. A simple track system with hooks adapts as needs change.
- Work surface: a fold-down workbench or a small cart gives you a spot to stage repairs and keep tools contained during projects.
Editing cues: reduce duplicate tools, discard paint older than the recommended shelf life, and keep only one spare of light bulbs and air filters in common sizes. Store camping gear together in two or three labeled bins so a weekend trip is a quick pull.
Seasonal cycle: create two large bins labeled In-Season and Off-Season. When the weather changes, swap clothing, sports gear, and décor in one go. This keeps high-traffic areas from storing past-season items for months.
Donate, sell, recycle: move out responsibly and quickly
Editing is powerful only if items leave the home. Decide in advance how you’ll offload and set a weekly appointment to follow through. Speed beats perfection here.
Guidelines:
- Donate items in clean, working condition to a local charity or community group. Bag securely and label by category (clothes, linens, kitchenware) to ease intake.
- Sell selectively: list higher-value, easy-to-ship items (small appliances, brand-name clothing, popular gadgets). Set a two-week window; if it doesn’t sell, donate.
- Recycle: check your city’s rules for cardboard, glass, batteries, and electronics. Many electronics stores host drop-offs for cables and devices.
- Hazardous materials: paint, chemicals, and expired car fluids require special handling; look for your municipality’s collection days.
Keep a permanent outbound station in the garage or near the door. Label it “To Donate/Sell” and keep your most-used drop-off locations saved in your map app. The simpler the pipeline, the lighter your home will feel.
Maintenance rhythms: daily, weekly, monthly
A calm home is about rhythms, not rigid rules. Small resets done often beat large cleanups done rarely. Use simple cues and time-boxed windows to keep your home in a near-ready state most days.
Daily micro-habits (5–10 minutes total):
- Entry reset: put keys on the hook, place mail in the tray, and place shoes on the mat.
- Surface rule: before bed, clear the kitchen island and living room coffee table. One-minute swipe with a cloth.
- Laundry glide: if the hamper section is full, start a load. Fold and put away before bed or first thing in the morning.
- Nightstand calm: return cups to the kitchen and place the current book on the tray.
Weekly anchors (45–60 minutes total across the week):
- Paper 20: pay, file, or scan; shred what’s done. Move lingering actions to your to-do list.
- Fridge five: toss expired items, wipe one shelf, and restock the “use first” bin.
- Bedding rotation: strip and wash sheets; replace with a spare set that’s ready to go.
- Reset cables and chargers: return strays to the tech bin and label any new ones.
Monthly sweep (60–90 minutes):
- Zone tune-up: pick one room and run the four-part loop (empty, edit, contain, reset) on a small area like a drawer or a shelf.
- Donation drop: empty the outbound station, record any tax donation receipts, and note what categories keep over-accumulating.
- Tool and supply check: replace worn-out cleaning cloths, verify batteries in remotes, and restock household staples.
Use a simple visual cue to remember rhythms. A sticky note on the inside of a cabinet door works, or a shared family calendar with icons. Choose the smallest version of a habit that keeps your space workable most days. That’s sustainable progress.
Choosing containers and labels that actually help
Containers do not organize your home; your choices and habits do. But good containers make it easier to keep your choices. Buy after you edit, measure, and test with temporary labels. Aim for clear, simple, and sturdy.
Container guidelines:
- Match container effort to task frequency: high-use items belong in open bins or drawers with wide dividers. Low-use items can live in lidded boxes or higher shelves.
- Choose the smallest container that comfortably fits the category; a little constraint helps avoid over-accumulation.
- Prefer rectangles over circles; they waste less space and stack better.
- Use drawer dividers to prevent items from sliding into a jumble; shallow trays work wonders in kitchens and bathrooms.
Labeling guidelines:
- Label where your eyes go first, not where it looks pretty. The label should face you when you approach the shelf or open the drawer.
- Use clear, simple words: Snacks, Pasta, Chargers, Backups. If you need more detail, add a sub-label inside the container.
- Start with painter’s tape to test categories. After two weeks, move to durable labels once the system proves itself.
If you need product ideas or space-by-space examples, you can also browse tools and organizational examples on our home page at Household Products Map. You’ll find plenty of low-friction containers that fit the principles above.
When time, space, or energy is tight
Life seasons change, and so should your approach. If you’re short on time, energy, or square footage, lighten expectations and shrink the scope.
Time pinch plan:
- Micro-target: commit to one drawer, one shelf, or one flat surface per day, five days a week. Set a 10-minute timer; stop when it rings.
- Use “touch it once”: when you pick something up, make a decision—keep here, keep elsewhere, donate, or trash. Avoid setting items down “for later.”
- Batch outbound: every Friday, take donation/sell items to the car, and schedule a drop during weekend errands.
Small-space strategy:
- Go vertical: use wall hooks behind doors, install narrow shelves, and hang shoe organizers for accessories or cleaning supplies.
- Use furniture with storage: ottomans with trays, coffee tables with shelves, bed frames with drawers.
- Limit open storage: in tight quarters, visible bins can read messy. Use doors, curtains, or lidded boxes for calmer lines.
Low-energy approach:
- Work the 1-1-1: one surface, one drawer, one decision. Celebrate small wins.
- Pair tasks with routine: tidy the bathroom counter while the shower warms; clear the nightstand while your tea steeps.
- Ask for help: assign family members one clear job each day (trash out, wipe counters, toy bin reset). Keep instructions simple and repeatable.
Keep the gains: your 30-day house combing calendar
Here is a simple four-week calendar that cements the systems you just built. Each day’s action is small but meaningful, and the whole loop fits into real life. Adjust days to match your schedule.
Week 1: Entry and living
- Mon: install key hook and label shoe tray spots.
- Tue: tray for remotes, wrap and label two chargers.
- Wed: fold throws into a basket; remove one décor item that feels like visual noise.
- Thu: magazine file purge; keep only current issues.
- Fri: donation drop from Keep Elsewhere bag.
- Sat: vacuum high-traffic areas; wipe baseboards in entry.
- Sun: rest and enjoy the cleared surfaces.
Week 2: Kitchen
- Mon: clear and wipe the main prep zone; relocate rarely used appliances.
- Tue: install a snack bin and a breakfast bin; label them.
- Wed: vertical rack for pans or baking sheets.
- Thu: pantry review; start a “use first” bin.
- Fri: fridge five and grocery list check-in.
- Sat: clear one cabinet, edit duplicates, and re-home by task.
- Sun: plan three simple meals around the “use first” bin.
Week 3: Bathrooms and laundry
- Mon: build one portable cleaning caddy.
- Tue: divide one drawer per person; label sections.
- Wed: reduce towels to the rotation number that fits your shelves.
- Thu: set up a three-compartment hamper or label existing sections.
- Fri: review backstock; limit to one spare each.
- Sat: choose a consistent folding zone; try folding as laundry finishes.
- Sun: 10-minute counter reset in each bathroom.
Week 4: Bedrooms, kids, and storage
- Mon: 60-minute closet try-on; create a capsule section.
- Tue: nightstand tray setup; clear and reset.
- Wed: kids’ display shelf and rotation bins; label with pictures.
- Thu: homework caddy or art cart build.
- Fri: garage zones mapped and labeled; set up outbound station.
- Sat: seasonal swap using In-Season/Off-Season bins.
- Sun: donation drop and calendar review for the month ahead.
By the end of 30 days, you will have a home that tells you where things live and how to put them back. You will also have a short list of rhythms that keep everything running with less effort. Save this calendar and repeat quarterly to refresh your systems.
House combing is not about perfection; it’s about flow. When everything has a steady route—into the home, through daily routines, and out again—calm becomes your default setting. Start with one room, run the loop, label lightly, and let the space teach you what works. You’ll feel the difference the next morning when you wake to clear surfaces and easy choices.