

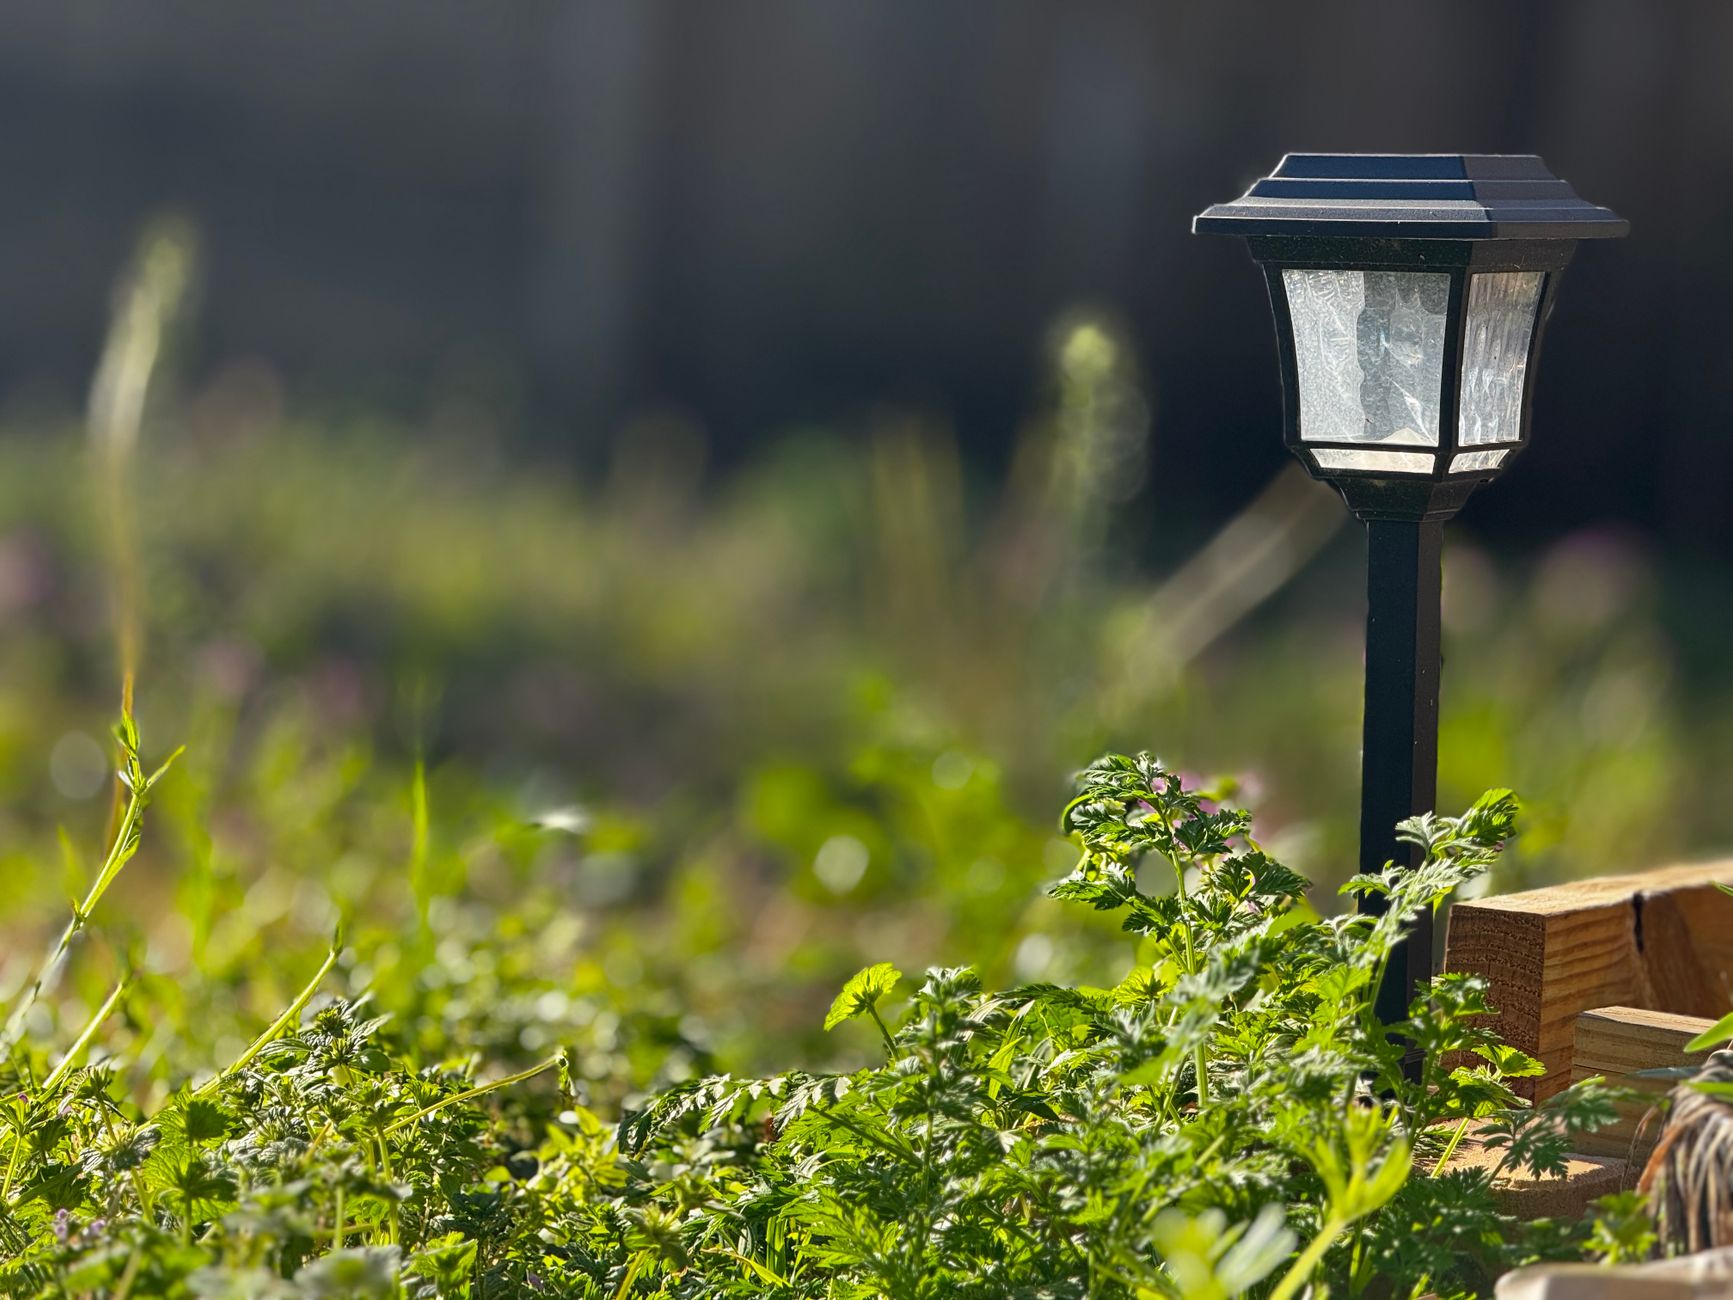
Few upgrades transform a yard as quickly and affordably as solar garden lights, and this guide walks you through every decision from planning and design to long-term care so your lights stay bright, reliable, and beautiful season after season.
If you’re looking for additional ideas across outdoor categories, browse inspiration at Household Products Map, then come back to this step-by-step plan to bring your own lighting concept to life.
Why solar for the garden: benefits that matter day and night
Solar lighting makes sense because it’s cordless, simple to install, and self-powered. That means fewer trenches, no permits or electricians in most cases, and a fast route to creating safe walkways, inviting patios, and focal points that look intentional after dark. A well-laid-out array improves navigation for family and guests, lowers trip hazards on paths and steps, and adds depth and drama to plantings or architecture. Carefully chosen units can withstand weather, reduce maintenance chores, and blend into your landscape rather than distract from it.
Beyond convenience, solar garden lights scale well. Start with a handful of path lights to define a route and expand to accent fixtures or spotlights as your plantings mature. Because they’re modular, it’s easy to iterate on layout: move a stake a foot to the left, aim a spotlight differently, or swap a warm white fixture for a neutral one to change the mood. Flexibility is the key advantage: you can test ideas at dusk and adjust in minutes.
There’s also the energy perspective. While you won’t see these devices on a utility bill, thinking in terms of charge, run-time, and light output helps you choose fixtures that behave predictably. Understanding the interplay among the panel, battery, and LED lets you pick balanced gear that works in your climate and season.
How solar garden lights work: components and performance basics
Every solar fixture is a small system. Knowing the parts helps you select durable models and troubleshoot issues without guesswork.
- Photovoltaic panel: Captures sunlight and converts it to electricity. Size, orientation, and cleanliness strongly affect daily charge input.
- Battery: Stores energy for night use. Many consumer fixtures use lithium-ion or LiFePO4 cells because they handle many cycles and deliver steady output.
- LEDs: Emit the light. Look for lumen ratings (brightness) and correlated color temperature (CCT) to match the mood you want.
- Driver and controller: Manage charging and discharge. Some include dusk-to-dawn sensors, motion sensors, or multiple brightness modes.
- Housing and optics: Protect electronics, shape the beam, and define the aesthetic. Materials and sealing determine how well fixtures resist rain, dust, and UV exposure.
During the day, the panel charges the battery. After dusk, the controller powers LEDs until battery voltage dips to a protective cutoff. When you read specs, pay attention to three numbers together: panel area or wattage, battery capacity (mAh or Wh), and run-time at a stated lumen level. Oversized panels charge faster on short winter days. Larger batteries extend run-time. Efficient LEDs translate each watt into more visible light. Balanced gear matches these elements so the fixture charges well, shines as long as you expect, and recovers quickly the next day.
Two quick terms you’ll see in spec sheets:
- IP rating: The ingress protection rating describes sealing against dust and water. IP65 is a practical benchmark for fixtures exposed to direct rain.
- CCT (Kelvin): Warm white (2700–3000K) feels cozy and natural for gardens; neutral (3500–4000K) suits contemporary scenes; cool (5000K) can be reserved for security areas or accents.
Solar garden lights: planning and layout fundamentals
A successful plan balances safety, aesthetics, and simplicity. For most yards, start by sketching the space: mark paths, steps, seating, architectural edges, tall plants, and water. Decide what must be visible for safe movement, then mark focal points you want to highlight. Place lights to serve those goals instead of sprinkling evenly without intent.
Practical layout habits:
- Layer the light: Combine path markers for guidance, accent lights for texture, and spotlights for focal points such as trees, sculptures, or water features.
- Use contrast: Dark gaps between lit areas add drama and keep the eye moving. Not everything needs a beam. Restraint makes highlights pop.
- Match fixture height to task: Shorter lights close to the ground help with path edges; taller stakes spread light wider across shrubs and borders.
- Think daytime visibility: Fixtures should complement planting style and hardscape when the sun is up. Dark bronze or black disappears among foliage; brushed steel suits modern patios.
- Minimize glare: Favor caps and optics that direct light down. If glare appears, lower the fixture or switch to louvered or hooded designs.
Before buying, walk the garden at dusk with a flashlight. Point beams, cast pools of light, and observe what feels useful versus distracting. That preview session will help you decide how many fixtures you actually need, where they belong, and which beam patterns fit each zone.
Fixture types and where each shines
Choosing the right form factor keeps your design clean and your budget sensible. Here are common categories and best uses.
- Path lights: Short posts with wide diffusers. Best for gentle, even illumination along walkways and borders. Space them 1.5–2.5 times the mounting height apart to avoid runway stripes or dark holes.
- Bollards: Taller, sturdier posts with controlled optics. Good for driveways and wide walkways where durability matters.
- Spotlights: Adjustable heads on stakes or bases that create narrow to medium beams. Use them to uplight tree canopies, graze fence textures, or draw attention to sculptures. Models with adjustable angles and beam widths offer flexibility.
- Wall washers: Wider beams that softly light surfaces. They add a backdrop glow that defines edges and reduces harsh contrasts.
- Deck and step lights: Slim, screw-mounted units for treads, risers, or railings. Seek robust housings, good sealing, and designs that keep light on the surface rather than into eyes.
- String and festoon lights: Create ambience across pergolas, dining areas, or along fences. Choose strings with removable or replaceable bulbs and ensure the solar panel can mount in full sun even if the string lives under partial shade.
- Decorative lanterns: Patterned light for mood. Use sparingly as accents so they don’t compete with your more functional layers.
A practical sequence is to secure path safety first, add a few accent beams for depth, then layer in decorative or social lighting over seating areas. This approach keeps the garden usable while you refine the vibe with modest additions over time.
Sizing basics: panels, batteries, lumen levels, and run-time
Balanced sizing prevents disappointment. A tiny panel with a big battery may never fully charge in winter, and a bright mode may drain a small battery far faster than the spec sheet suggests. Use these rules of thumb.
- Daily energy budget: Estimate how many watt-hours your fixture needs nightly. Example: a path light drawing 0.5 watts for 8 hours consumes ~4 Wh. A 1.5 W panel in good sun can replenish that with headroom most of the year.
- Panel orientation: Aim the panel south in the northern hemisphere (north in the southern hemisphere) and tilt near your latitude angle. Avoid midday shading because noon to 3 p.m. often delivers the bulk of daily energy.
- Battery capacity: Expressed as Wh is most useful (Wh = voltage × amp-hours). A 3.2 V, 1500 mAh LiFePO4 cell holds ~4.8 Wh. Match capacity to your nightly energy budget and desired run-time.
- Lumen expectations: Many solar path lights produce 10–40 lumens each, enough for wayfinding; spotlights often range 100–300 lumens for accents. Resist chasing big lumen numbers if panel size and battery don’t support them.
- Modes and dimming: Lower modes dramatically extend run-time on short winter days. Motion-boosted modes let you keep a gentle background glow and only raise output when needed.
Sanity check a datasheet by comparing panel area to claimed run-time. If a light promises long, bright nights but shows a small panel and small battery, expect dimmer or shorter performance in shoulder seasons. Conversely, modest brightness paired with a generous panel often provides the most consistent real-world results, especially in cloudy or high-latitude locations.
Placement strategies by zone: paths, steps, patios, trees, and water
Smart placement makes even modest fixtures look intentional and effective. Use these guidelines for common zones.
- Paths: Stagger fixtures on alternating sides to avoid “runway” visuals. Keep lenses just high enough to cast across the path surface. If glare appears in your eyes at walking height, lower the fixture or switch to capped heads.
- Steps: Mount low and shielded; aim for light on the tread surface. Run a consistent line of step lights rather than a few bright points to avoid harsh shadows.
- Patios and seating: Combine subtle perimeter glow with softer overhead ambience. Wall washers along the house or fence create a backdrop; string lights add social warmth; a few accents on planters or art give texture. Avoid putting bright fixtures at eye level near dining.
- Trees and tall plants: One steep uplight reveals bark texture; a second, lower angle opens the canopy. Test provisional angles at dusk and adjust in inches, not feet, to refine shadow patterns.
- Water features: Light surroundings rather than the water’s surface, which can reflect glare. Uplight nearby grasses, stones, or an adjacent trunk; keep electrical components away from splash zones unless rated for the exposure.
Finally, mind the sun. Panels need clear exposure in midday. If a perfect light position sits under a shrub, pick a model with a remote panel on a short cable. Mount the panel where it sees open sky and route the cable neatly along edges or under mulch.
Installation day: from unboxing to final aim
Solar garden lights are usually DIY-friendly, but a careful process pays off in cleaner lines, better durability, and fewer call-backs to your future self.
- Charge and test: If recommended, charge the fixtures in full sun for a day with switches off. Confirm each unit powers on so you don’t plant a dud.
- Layout dry run: Place fixtures on the ground where you intend to install. Preview at dusk for beam spread and glare. Adjust spacing and angles before committing.
- Stake or mount carefully: For soil, pre-pierce holes with a narrow rod to avoid bending stakes. For decks or walls, predrill pilot holes and use stainless screws. Keep panels at the intended tilt and direction.
- Aim and choose modes: Angle spotlights toward texture rather than directly at eyes. Verify run-time on chosen modes across a few nights. Adjust brightness if battery drains too quickly.
- Hide cables: For fixtures with separate panels, route cables along borders, through conduit, or under mulch. Secure with clips to avoid mower or trimmer damage.
Live with the arrangement for a few evenings. Take phone photos to compare small tweaks. Often, an inch or two of repositioning transforms flat lighting into a layered, pleasant scene.
Maintenance calendar and quick fixes to keep the glow steady
Solar is low upkeep, not zero upkeep. A light seasonal routine keeps performance consistent.
- Monthly quick check: Glance over panels for dust or debris. Make small aim corrections after wind or yard work. Verify timers or modes match the season.
- Spring: Wipe panels with a soft cloth and mild soapy water; rinse gently. Check gaskets, tighten loose stakes, and clear lenses. Replace worn rechargeable cells if your model uses replaceable batteries.
- Summer: Watch for heat buildup on panels installed over dark stone. Provide airflow around housings. Trim nearby foliage that creeps into panel shadows.
- Autumn: Reset panel tilt if your latitude benefits from a steeper winter angle. Switch fixtures to lower modes to stretch run-time as days shorten.
- Winter: Brush off snow after storms. Clear ice gently; avoid chipping lenses. If severe weather is routine, bring decorative lanterns indoors and keep safety layers in place.
Typical issues and quick checks:
- Lights don’t turn on: Confirm switches are in auto mode, panels are connected, and bright ambient light isn’t fooling the dusk sensor. Test in a dark room by covering the panel to see if LEDs trigger.
- Run-time shorter than expected: Clean the panel and try a lower brightness mode for a few nights. If performance remains poor after sunny days, replace the battery.
- Uneven brightness across fixtures: Shade differences add up. Move the dimmer units to better sun, rotate panels, or swap positions to balance exposure.
- Flicker or intermittent output: Check connections and ensure the battery seats firmly. Persistent flicker can point to a failing driver; contact the manufacturer if still in warranty.
Climate and season: plan for real-world weather
Sun angle, day length, and temperature all influence solar lighting. Plan the system for the hardest month in your location, not the easiest.
- High latitudes: Winter days are short with shallow sun. Use larger panels, lower lumen modes, and steeper panel tilt during cold months. Consider motion-boosted modes to retain brightness without draining batteries.
- Hot climates: Heat ages batteries. Favor LiFePO4 chemistry and allow airflow around housings. Avoid mounting panels directly over black stone where heat accumulates.
- Snow and frost: Elevate panels above typical snow drift height; brush snow after storms. Don’t scrape with hard tools that can scratch panel glass or polycarbonate.
- Wind and storms: Stake deeper in sandy soils, add anchors for string lights, and pick heavier housings for exposed ridges. After storms, inspect and reset bearings or angles.
Think seasonally: use brighter settings for summer gatherings and lower modes during winter to prioritize run-time. Flexing modes is smarter than buying oversized hardware you rarely need.
Smart controls and neighbor-friendly lighting
Controls make solar lighting adaptable and polite. Thoughtful choices prevent light spill and late-night frustration, especially in close neighborhoods.
- Motion-boosted modes: Keep a gentle background glow and boost when someone approaches. Great for steps, entries, and side paths.
- Selectable CCT: Models that shift from warm to neutral let you set a cozy everyday scene and switch to neutral for tasks or events.
- Timers: Shutting off at midnight preserves charge for the next day and keeps things dark when neighbors prefer it.
- Shielding and aiming: Aim beams down and away from windows. Use louvers or caps to reduce spill and glare.
Safety is about clear cues. Light transitions in grade, step edges, and edges of patios, but avoid aiming light into eyes. If you live near wildlife corridors, keep brightness modest and avoid blue-heavy CCTs that disrupt nocturnal rhythms.
Budgeting, ROI, and sustainability tips
Solar garden lights deliver value because installation is inexpensive and energy costs are effectively zero. Still, a basic budget and sustainability plan keep expectations aligned with reality.
- Budget by layer: Allocate roughly 40 percent for path safety, 40 percent for accent lighting, and 20 percent for decorative or gathering areas. Usability first, ambience second.
- Quality over quantity: A slightly more expensive model with a larger panel and better battery can outlast cheaper units several times over. Longer life means fewer replacements and less waste.
- Energy math: If a path light draws 0.5 watts for 8 hours, that’s ~4 Wh nightly. A small 1.5 W panel in average sun can supply that with headroom in many climates. For a 2 W spotlight running 6 hours, plan a bigger panel and battery, or use motion boost to conserve charge.
- End-of-life planning: When replacing rechargeable cells, recycle batteries according to local rules. Metal housings and glass lenses may be recyclable; check community guidelines.
Think in clusters: a cluster of six efficient path lights and two accent spots can cover a typical suburban path and entry for far less than a wired system, especially when you factor in avoided trenching and professional labor.
Solar garden lights: a quick buyer’s checklist
Use this checklist in-store or online to filter options quickly.
- Panel: Is the panel area generous for the claimed brightness and run-time? Is it positioned or mountable for midday sun?
- Battery: Does the spec list capacity in Wh or mAh? Is the chemistry LiFePO4 or a comparable long-cycle choice?
- IP rating: Is it IP65 or better if exposed directly to rain?
- Optics: Are there caps, diffusers, or louvers to control glare?
- Modes: Are there dim modes and motion boost options to tailor run-time across seasons?
- Mounting: Are stakes strong enough? Are screws stainless? Is there a remote panel option if the light needs shade?
- Reviews: Do real-world reviews mention consistent run-time, sturdy construction, and good customer support?
Don’t forget style cohesion: pick a consistent finish family (bronze, black, stainless) and a shared CCT so the scene feels unified rather than pieced together.
Case-based examples: two sample layouts you can adapt
Imagining real spaces makes decisions easier. Use these layouts as starting points.
Front path and entry (40 feet, three shallow steps)
- Place eight 12-inch path lights, staggered, ~7 feet apart, warm white 3000K. Use capped heads to reduce glare.
- Mount two low-profile step lights on risers to wash treads. If using solar units with remote panels, mount panels at the edge of a sunny bed near the steps.
- Add two adjustable spotlights: one opens the ornamental tree canopy; the other gently grazes the stone wall near the door. Set a moderate evening mode with motion boost to high for arrivals.
- Enable a timer to switch off boosts at midnight while a low background glow remains for aesthetics.
- Mark the first weekend of spring and fall for panel wipe-down, lens cleaning, and a quick aim check.
Small patio and raised beds (20 × 14 feet)
- Install two wall washers along the fence to create a soft backdrop. Choose neutral white (3500K) for a livelier dining mood.
- String solar festoon lights across the seating area with a cabled panel mounted at the sunniest corner. Use a dim mode for casual evenings and a brighter mode for gatherings.
- Stake four short path lights around the raised beds to define edges without bright spots.
- Use a small spotlight with a narrow beam to highlight a focal planter or art piece.
Both plans emphasize guidance, subtle background light, and a few highlights. Adjust counts up or down to suit yard size and plant density.
FAQ about solar garden lights
How many fixtures do I need for a typical path? As a starting point, one fixture every 6–8 feet for 12–18 inch tall path lights, staggered on opposite sides. Shorter fixtures need closer spacing; taller ones can be farther apart. Test at dusk and adjust with your eyes.
What color temperature is best? For gardens and natural stone, 2700–3000K feels most comfortable and blends with foliage. For modern metal and concrete, neutral 3500–4000K can fit the mood. Use cool white sparingly to avoid a stark look.
Do fixtures need to come indoors in winter? Most rated outdoor fixtures can remain outside. If severe ice storms or heavy blizzards are routine, bring fragile decorative lanterns indoors but leave safety layers where they are.
Can I mix solar with low-voltage wired fixtures? Absolutely. Many designers blend both: solar for flexible accents and wired lines for consistent output on critical areas. Keep color temperatures and styles cohesive so the scene looks unified.
What about wildlife and bugs? Warm white light around 2700–3000K is less likely to attract insects or disrupt wildlife routines than cool blue-heavy light. Place fixtures low and shield beams to keep illumination on the ground where people walk.
How long do batteries last? It depends on chemistry and climate. LiFePO4 cells can serve for many seasons under gentle charge/discharge cycles. If run-time shrinks despite clean panels and good sun, it may be time to replace cells in models designed for replacement.
Quality checklist and final touches
Before you click buy or push a stake into the soil, run through this quick quality checklist so your system is reliable and cohesive.
- Panel exposure: Can each panel see midday sun without shade from noon to 3 p.m. in most seasons?
- Balanced specs: Do panel size, battery capacity, and lumen output align with your climate and night length?
- Glare control: Are diffusers or caps designed to shield eyes while lighting surfaces?
- Sealing and build: Do housings carry an appropriate IP rating and use UV-stable materials?
- Mode flexibility: Are there low modes for winter and high modes for events so you can adapt without swapping hardware?
- Style cohesion: Do fixtures share a finish and CCT that match your home and plant palette?
When everything checks out, take photos of your layout at night and note what you like and what you’d change. Small tweaks—tilting a head, moving a stake, dimming a mode—often yield big improvements. That iterative habit is the secret behind gardens that look designed, not decorated, after dark. With a clear plan, balanced components, and a light seasonal routine, your solar garden lights will guide, flatter, and invite—through many evenings to come.