

Whether you run a small farm greenhouse or a commercial nursery, seedling production is the backbone of reliable crops. Done well, it turns seeds into uniform, sturdy transplants that establish quickly and hit market windows. Done inconsistently, it drains time and space, and forces last‑minute replants that disrupt the entire season. This practical guide consolidates planning math, substrate and container choices, climate control, irrigation and nutrition, hygiene, scheduling, and quality control into one workflow you can adapt to your scale and species list.
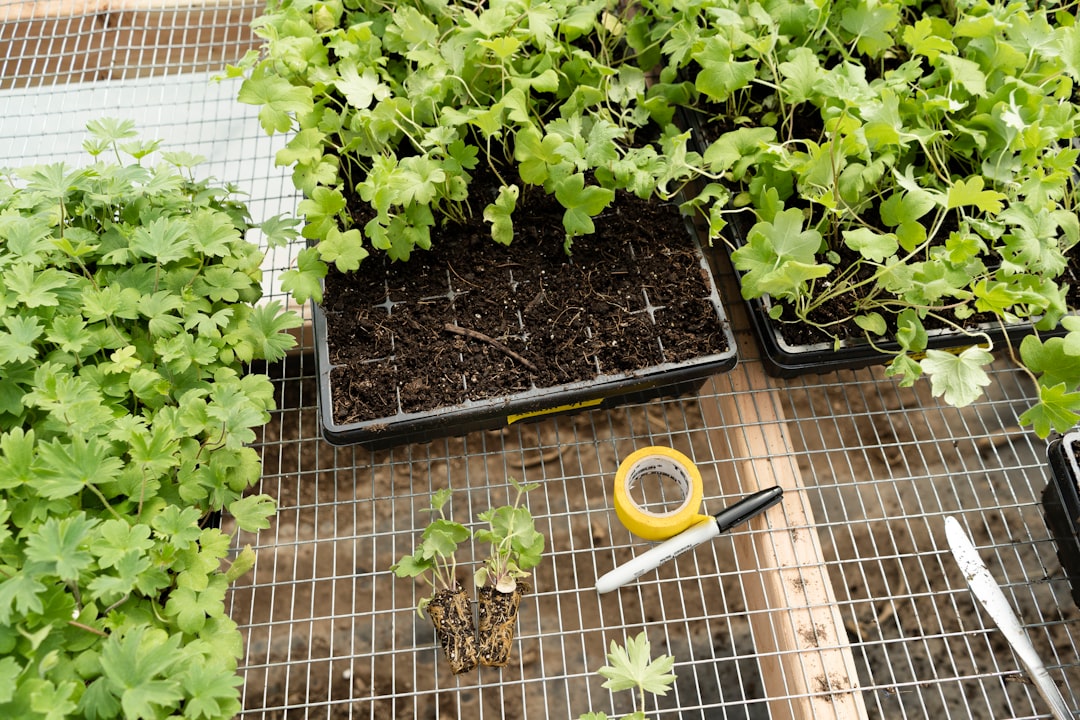
What seedling production means for modern nurseries
Seedling work has changed. Where a bench once held a few flats at a time, today’s propagation rooms can turn thousands of seeds into uniform plugs within days. That scale brings efficiency but also new constraints: airflow, sanitation, fertigation uniformity, and precise scheduling. The goal is not just to germinate seeds, but to deliver a transplant that is the right size, age, and physiological readiness for its next environment, whether that is a field bed, high tunnel, or a controlled environment finishing zone.
Uniformity is king. A uniform tray reduces culling and speeds up downstream operations like grading and packing. It also allows your crop time assumptions to hold, because the whole tray tends to move together. Inconsistent moisture, uneven heat, and poorly mixed media show up as staggered germination, etiolation, or weak root systems. The propagation manager’s job is to design systems that reduce those variances at every step.
Thinking this way reframes propagation as a manufacturing line with biological materials: inputs (seed lots, substrate, water, nutrition, heat, light), processes (sowing, misting, venting, thinning, spacing), outputs (uniform plugs, counts, grades), and quality checks (germination %, usable %, root index). The tactics in this article are designed to help you tighten each of those links without overcomplicating daily work.
Seedling production planning and capacity math
Planning begins with capacity. How many trays can your germination space hold without sacrificing airflow? How many trays can your team sow, water, and monitor daily with high care? And how does that translate into weekly sowing targets to hit transplant windows?
Start with weekly demand. List the crops, their desired transplant dates, and their typical crop time from sowing to transplant at your target temperature. Work backward to find sowing weeks. Then aggregate tray counts per week and compare to actual bench area, heater output, and staff hours.
A quick capacity worksheet helps:
- Bench area (m²) divided by tray footprint (m²) gives maximum trays per bench layer. If you rack vertically, multiply by layers actually used during germination.
- Airflow constraint: leave 5–10 cm between trays or skip every fourth position when using domes; this typically reduces the theoretical maximum by 10–25% but greatly improves uniformity.
- Labor constraint: assuming high‑care sowing at 15–30 trays per person‑hour (varies by cell size and species), ensure sowing targets fit into planned labor windows. Include time for substrate mixing, sanitation, and labeling.
Worked example: You need 1,200 128‑cell trays of brassicas and leafy greens across a four‑week window, with average crop time 4 weeks to transplant. Your germination room has 50 m² of benching. Each 128 tray footprint is 0.025 m² including spacing; theoretical max is 2,000 trays (50/0.025). You apply a 20% airflow derate, leaving 1,600 trays. If you plan to use half the room for germination (domes, higher humidity) and half for post‑emergence hardening under drier air, you effectively have 800 trays in germination at any given time. With brassicas germinating in 2–4 days, a two‑turn per week rhythm is feasible, supporting 1,600 tray‑turns per week. Your four‑week total of 1,200 trays spreads to 300 per week, which is within the room’s airflow‑aware capacity. Labor wise, at 20 trays per hour, you need 15 hours of sowing plus 5–10 hours for prep and aftercare per week. This math shows you can hit targets without overcrowding.
Formalizing capacity avoids the common trap of “one extra cart” that tips the microclimate out of balance. Write and post a simple rule: no more than X trays per bench section, Y sowing hours per day, and Z maximum humidity setpoint in the first 48 hours. Make it easy to follow in busy weeks.
Facility and bench layout: trays, cell sizes, and airflow
Bench layout and the tray program determine airflow and moisture patterns. Choose cell sizes to match species and market timing: 288s for quick leafy starts and microgreens, 128s for brassicas and lettuce transplants, 72s–84s for fruiting crops and slower species, and 50s–72s for cucurbits and vigorous starts that you transplant young. Oversized cells for slow crops waste media and space; undersized cells lead to root binding or transplant shock.
Uniform airflow is the cheapest way to improve results. Use horizontal airflow (HAF) fans to create gentle, non‑drafty circulation across trays; pair that with vertical venting via roof vents or dehumidifiers to pull moist air out after misting. Avoid dead corners by leaving aisles and using shorter benches rather than one continuous surface that traps air on the far side.
Simple spacing rules help: on solid benches, set lath strips or mesh to raise trays 3–5 cm for bottom airflow; leave finger‑width gaps between trays; and never stack blocks of solid flats without gaps. When domes are used, vent them after radicle emergence to reduce humidity and fungal pressure. If you use flood benches, ensure quick drainback; standing water for more than a few minutes invites algae and uneven media saturation.
Finally, label consistently and visibly. A left‑to‑right, front‑to‑back bench map supported by tray tags avoids mixing lots and lets you find specific batches quickly for measurements. Include sowing date, species, variety, lot ID, expected emergence day, and target transplant week.
Substrates and containers: mix recipes and sanitation
Propagation substrates must balance water‑holding, air‑filled porosity, and stable structure under frequent watering. A typical soilless mix for plugs combines peat or coir for water retention, perlite or vermiculite for porosity, and a small percentage of composted bark for structure. For many small‑seeded crops, medium‑fine peat/coir with 20–30% perlite and 10–20% vermiculite supports even moisture around the seed while leaving air to the roots once they extend.
Mix consistency matters more than chasing perfect percentages. Sieve coarse chunks for small cells, pre‑moisten consistently (to the point a squeezed handful forms a soft ball that breaks with a tap), and fill trays without compressing the media. A light top press or brush‑off levels the surface for even sowing depth; avoid dense packing that reduces air space.
Containers are part of the system. Clean and sanitize trays and dibblers between cycles to reduce biofilm and algae; they can harbor gnats, fungi, or residue that alters wetting. If reusing trays, wash with detergent, rinse, and apply an approved sanitizer at labeled rates; allow full drying. Consider a color code or mark regrind trays that are nearing end‑of‑life so they are retired before structural failure under flood benches.
Finally, wetting agents wear off. If a batch of media resists wetting, pre‑wet with slightly warmer water plus a plug‑safe surfactant per label. Avoid oversaturation; you want moisture uniformity, not puddles.
Propagation environment: light, temperature, humidity, and VPD
Germination and early growth depend on predictable climate. While species preferences vary, most vegetable and herb seeds germinate well at media temperatures of 22–26 °C (72–79 °F) with media staying 20–24 °C until cotyledons expand. Bottom heat from mats or hot water benches stabilizes media temperatures when air swings; verify with a probe thermometer inserted in the plug, not just room air readings.
Light during germination is species‑specific: some seeds prefer darkness to trigger uniform germination; many are indifferent; a few benefit from light exposure. After emergence, light intensity of 150–300 µmol·m⁻²·s⁻¹ (PPFD) for leafy crops and 200–400 µmol for fruiting crops in propagation keeps seedlings compact. If you see stretch, it is usually a combination of low light, high temperatures, and high humidity.
Humidity control is easier when you think in terms of vapor pressure deficit (VPD), the dryness of air relative to leaf temperature. A VPD between roughly 0.6 and 1.0 kPa during early propagation reduces excessive transpiration while still driving gas exchange. Translate this into practical setpoints: for a room at 22 °C air temperature, 70–80% relative humidity often gives a workable VPD range for newly emerged seedlings. As true leaves form, gradually increase airflow and lower humidity toward 55–65% to toughen tissue.
Vent after misting. Use short, frequent vent cycles to remove humid air without chilling seedlings. At night, avoid large temperature drops that create condensation on domes or leaves; a 2–3 °C night setback is gentler than swinging from 24 °C to 16 °C. Pair climate targets with a simple daily log so you can relate crop responses to actual conditions rather than memory.
Irrigation routines and fertigation basics
The best irrigation program is simple, repeatable, and gentle on small cells. Before sowing, pre‑moisten media uniformly. During germination, water with a fine rose or mist that wets the top few millimeters without floating seed out of cells. Once radicles anchor, shift from frequent light misting to fewer, deeper irrigations that push water to the bottom of the cell and encourage downward root growth.
Learn the weight test: pick up a tray and feel the difference between saturated, optimal, and too dry. Combine this with visual cues (media color shift, leaf turgor) and a wooden skewer or moisture probe. Set a target “dry‑back” interval between irrigations that fits species and cell size; for many 128s and 200s, that might be 24–48 hours post‑emergence in moderate conditions, shorter in higher light and airflow.
Nutrition starts light. Many mixes include a starter charge. Once cotyledons expand, feed at 50–75 ppm N (for example, 0.5–0.75 g/L of a balanced soluble fertilizer depending on formulation) once or twice per week, watching leaf color and growth rate. Increase to 100–150 ppm N as first true leaves develop for species with higher demand, always ensuring leachate EC stays in a gentle range for young tissue. Flush occasionally with clear water to avoid salt buildup in small volumes.
Consistency is more important than chasing a perfect recipe. Keep a simple fertigation sheet: date, rate, pH, EC, crop response. These notes make future cycles easier and help new staff follow the program without guesswork.
Seed handling: viability, germination testing, and seed treatment
Seeds are living inventory. Store them cool, dry, and dark in labeled, sealed containers with a desiccant pack. Track lot numbers and test viability annually for long‑kept lots or high‑value seed. A quick paper towel germination test—25 to 100 seeds on moist towels in a bag at species‑appropriate temperature—tells you if a lot is strong, marginal, or needs higher sowing rates to meet counts.
Calibrate sowing depth and spacing. Small seed often prefers surface sowing with a light vermiculite or fine media cover; larger seed can be shallowly dibbled. Aim for consistent depth across the tray to avoid staggered emergence. Label every tray with sowing date and lot ID so performance issues can be traced and corrected.
Where appropriate and allowed, seed treatment such as priming or pelleting from reputable suppliers can improve handling and synchronization for small‑seeded species. Always follow supplier guidance and local regulations. For in‑house practices, keep it simple: sanitize tools and benches, use clean water sources, and avoid exposing seed to extremes of temperature or moisture before sowing.
Hygiene, biosecurity, and integrated pest management
Hygiene reduces losses and protects uniformity. Start clean and stay clean: sanitize benches, trays, domes, dibblers, and mist nozzles between cycles; maintain footbaths or dedicated propagation footwear at entries; and separate germination and finishing spaces so humid air does not recirculate to older crops. Keep doors closed and screens intact to limit flying pests.
Use an integrated pest management (IPM) program tailored to propagation. Propagation spaces favor shore flies, fungus gnats, and occasional aphids or thrips. Reduce standing water, clean algae, and use yellow sticky cards to monitor. Biological controls like beneficial nematodes or predatory mites are commonly used in propagation cycles; research compatible species and application timings for your crops and environment. When using inputs, follow labels and rotation guidelines carefully, especially around young tissue.
Scout routinely. A 10‑minute daily walk with a hand lens and sticky card counts recorded in a log will catch trends before they become problems. If you see repeated trouble on specific benches, check airflow, moisture patterns, and sanitation; pest pressure often follows microclimate patterns.
Scheduling and crop time calculators
Consistency comes from scheduling that accounts for real crop times, not just catalogs. Create a simple crop time table for your varieties at your propagation temperature. For each species, list days to emergence, days to cotyledon expansion, days to first true leaf, and transplant readiness at a defined leaf stage. Compare those numbers to actuals each cycle and adjust.
Build a sowing calendar that integrates demand, capacity, and temperature effects. For example, if you run 22–24 °C media temperature and lettuce takes 21 days to transplant in 128s, then a weekly lettuce sowing party of 60 trays can be planned every Tuesday morning, with expected transplant pull three weeks later on a Wednesday. Add a small buffer week for slow lots or cool spells.
Digital tools help. Many growers use spreadsheets with formulas to offset sowing and transplant dates; others adopt crop planning software. Keep it simple enough that the plan stays current in busy weeks. When a week overruns capacity, reschedule less time‑sensitive species rather than cramming extras into microclimates that are already full.
Hardening off, grading, packing, and logistics
Hardening is the bridge from soft propagation tissue to the real world. Over 5–10 days (species‑dependent), gradually increase airflow, lower humidity, and reduce night temperature setbacks to encourage thicker cuticles and sturdier stems. Increase light intensity and shorten irrigation intervals to train roots to seek moisture deeper in the cell. Avoid shocking plants; gradual adjustments build resilience.
Grade before shipping or transplanting. A/B/C grades keep teams aligned: A = transplant‑ready, uniform, strong roots; B = slightly small or uneven but usable for later slots; C = overgrown, weak, or below spec and should be culled. Accurate grading protects your reputation and saves labor downstream.
Packaging matters. For internal field moves, carts with secure shelves and wind protection prevent desiccation. For customer orders or off‑site fields, choose boxes or carts that protect foliage and trays while allowing some airflow. Label everything clearly with variety, lot, sowing date, and destination. Time loads to avoid the hottest hours; if delays occur, mist lightly before transport and on arrival.
Troubleshooting guide: symptoms, causes, adjustments
Propagation issues happen, even in well‑run rooms. A practical troubleshooting mindset is to connect visible symptoms with a short list of likely causes and one or two corrective actions you can take today.
- Staggered germination: uneven sowing depth or moisture; adjust dibbler setting, pre‑wet more uniformly, or cover lightly with vermiculite for humidity equalization.
- Stretchy seedlings: low light with high temperature and humidity; raise PPFD, lower air temperature 1–2 °C, increase airflow, and reduce humidity slightly.
- Yellowing cotyledons: substrate too wet or salts accumulating; increase dry‑back between irrigations, check EC, and consider a light flush; resume feeding at 50–75 ppm N.
- Root tips browning: high EC or saturated media; verify fertilizer rate and leachate EC; adjust irrigation to allow more air space.
- Algae on media: long surface wet times; improve airflow, shorten mist duration, and consider a top dressing of fine vermiculite to speed surface drying.
- Fungus gnats or shore flies: standing water and algae; clean floors and bench channels, improve drainback, and deploy monitoring plus compatible biocontrols.
Document each “find and fix” so the team can learn. If a specific bench or fan always appears in the notes, you have found a root cause that infrastructure tweaks can solve.
Recordkeeping, quality metrics, and continuous improvement
A simple quality system turns daily observations into better crops and less stress. Track a few metrics per lot:
- Germination rate (tested vs. observed) and usable % at transplant (discounting culls).
- Crop time from sow to transplant, compared to plan and climate logs.
- Root index at transplant (visual 1–5 rating for white, fibrous roots reaching cell edges).
- Uniformity score (e.g., standard deviation of plant height in a sample of cells).
Pair metrics with short post‑cycle reviews. Ask: What went right that we should formalize? What drifted? Which changes had the biggest effect with the least complexity? Use those insights to update SOPs and capacity rules. A laminated one‑page SOP by the propagation bench that captures fill, sow, water, climate, and scout steps is more valuable than a long binder few people read.
As your program matures, consider small experiments: two different media blends side‑by‑side, a slightly different VPD target, or a new tray style. Change one variable at a time, keep notes, and roll successful tweaks into the baseline. This is how consistent nurseries stay adaptable without chasing fads.
Checklists you can post by the bench
Checklists reduce mistakes when days get busy. Adapt these to your facility and species:
- Daily open: verify setpoints (temp, RH, lights, VPD), check HAF fans, inspect domes and vents, scan for standing water, read logbook for notes from prior shift.
- Before sowing: confirm seed lot IDs and counts, pre‑moisten media, sanitize tools and trays, calibrate dibbler, print tray labels.
- After sowing: light mist to settle, cover if needed, place trays per bench map, record sowing date and tray counts, set reminder for first emergence check.
- Daily care: weigh or probe sample trays for moisture, irrigate to target dry‑back, vent after misting, scout sticky cards and leaves, record EC/pH when feeding.
- Pre‑transplant: harden schedule posted, grade A/B/C, stage carts, print pull sheets and labels.
Solid checklists make cross‑training easier and keep quality stable when key staff are off.
Cost awareness without complexity
Propagation margins are often tight, but the biggest savings come from uniformity and fewer reworks, not shaving pennies off media. Track the few costs that move the needle: wasted trays due to culls, labor hours per tray through sowing and first irrigation, and rework hours from re‑sowing or spacing. A small reduction in re‑sows can free bench space and time that far exceeds a modest increase in media quality or improved airflow gear.
When budgeting, set aside money for basic instruments that raise confidence: a reliable EC/pH meter, a VPD chart on the wall, a few probe thermometers for media temperature, and spare fan belts. These are inexpensive compared to a single failed batch of high‑value plugs.
Where to go next
Mastering propagation turns the rest of your season from reactive to rhythmic. If you want reference checklists and planning templates, bookmark your internal SOP repository and maintain it like living code. For more practical articles aligned with this topic, explore the Breeding and Seedling Production section on our site. You can start from the homepage at householdproductsmap.com or browse related guides under the category here: Breeding and Seedling Production. Build your version of these systems, track the metrics, and refine. A season later, you will have fewer surprises and stronger starts ready exactly when your schedule calls for them.
Quick reference: species snapshots
Use these starting points and tailor to your conditions and varieties:
- Lettuce in 128s: media 21–23 °C, light immediately after sow for most types, 18–24 days to transplant at 150–250 µmol PPFD, RH 60–75% post‑emergence, feed 75–100 ppm N weekly.
- Brassicas in 128s: media 22–24 °C, light after emergence, 18–24 days to transplant, RH 60–70%, compact growth under 200–300 µmol, early hardening improves field vigor.
- Tomato/pepper in 72–84s: media 24–26 °C to germinate, 22–24 °C after, 28–42 days to transplant depending on size target, PPFD 250–400 µmol, RH 55–65%, step up feeding from 75 to 150 ppm N as true leaves expand.
- Cucurbits in 50–72s: sow shallow, media 24–26 °C, fast cycles of 10–18 days to transplant, avoid overgrown stems; keep RH moderate and irrigate by weight to avoid saturated media.
These are not rigid rules—use them as baselines for your own logs and observations.
Putting it all together
If you take only three things from this guide, let them be these:
- Capacity first: write and share bench, airflow, and labor limits, then schedule within them.
- Uniformity everywhere: choose cell sizes to match crops, standardize media prep, stabilize climate with airflow and gentle VPD targets, and irrigate to promote roots.
- Measure lightly, improve often: keep a small set of metrics and a short log; adjust one variable at a time and roll wins into SOPs.
With a clear plan, a few simple instruments, and a culture of writing things down, seedling work becomes predictable and satisfying. The end result is consistent, sturdy transplants that make the rest of the season smoother.